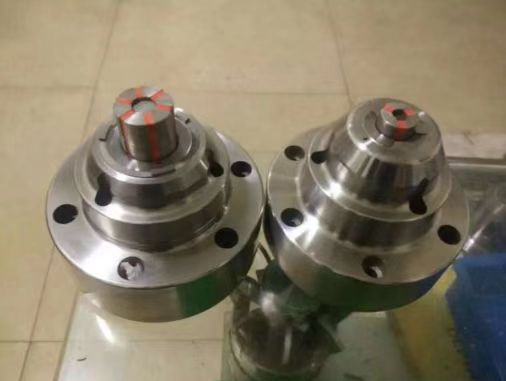
Gear collet precise positioning fixture and air tight inspection
Description of fixture accuracy
Parallelism ≤0.004mm;
The inner hole is the benchmark end face runout ≤0.004mm;
The inner hole is the benchmark outside diameter runout ≤0.01mm; The coaxial degree of 0.01 mm or less
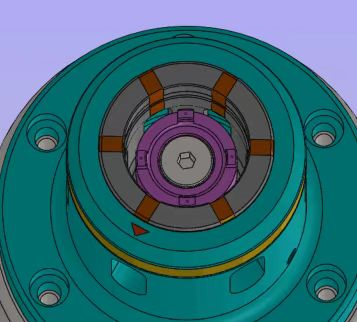
I. Standard scheme of outside diameter fixture


Jig action instructions:
After the workpiece is put into the corresponding indication point of the ear shape, the bottom backrest (purple mark) is taken as the benchmark, the clamping edge of the jacket and the workpiece are moved back together, so as to make the positioning surface better fit the datum surface.
Design Features:
1, the sleeve edge clamping side and workpiece backward movement can correct some of the deviation of the workpiece placement;
2, set up on the backrest of the test hole, in the case of debris and other causes not close to the datum level, alarm shutdown, to prevent the accuracy of out-of-tolerance products.
3, within a certain size range, replace the same type of products, only need to replace the backer and jacket, reduce the time and economic cost caused by product replacement.
4. Rubber is perfused between the gaps of the jacket, waterproof and iron filings are protected to protect the fixture body.
5, jacket unilateral clamping relaxation range of 0.3mm(automatic optional), suitable for manipulator loading and unloading to achieve automatic production.
6, fixture design for the highest spindle speed 6000R /min, in order to achieve efficient production needs.
7, the design can make A2-5.A2-6 unified, can also directly use the original tie rod.
8, dual air defense pull design, better prolong jacket life.
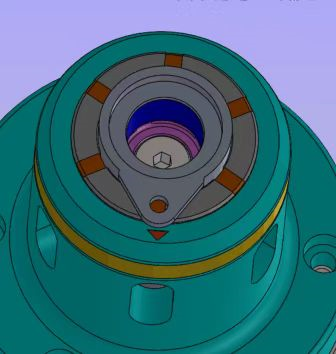
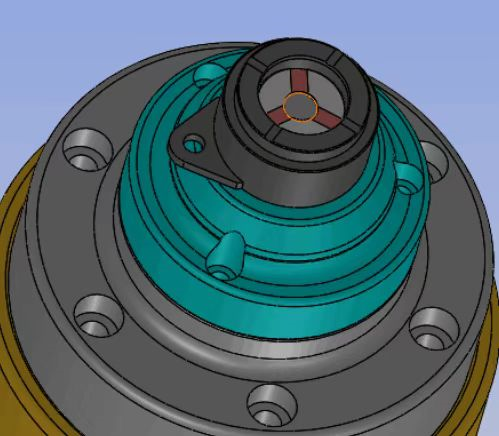
Two, internal rise jig

Jig action instructions:
After the workpiece is put in, the bottom backrest (blue mark) is taken as the benchmark, and the edge is tightened, and the edge and the workpiece are moved back together, so as to make the positioning surface better fit the datum surface.
Design Features:
1, rising sleeve edge tightening edge and workpiece backward movement can correct some of the deviation of workpiece placement;
2, set up on the backrest of the test hole, in the case of debris and other causes not close to the datum level, alarm shutdown, to prevent the accuracy of out-of-tolerance products.
3, in a certain size range, replace the same type of products, only need to replace the backer and cover, reduce the time and economic cost caused by product replacement.
4, the swelling structure is completely separated between metal perfusion rubber, parallel tightening and workpiece contact area is larger, and has shock absorption effect.
5, set up unilateral clamping relaxation range of 0.3mm (automatic optional), suitable for manipulator loading and unloading to achieve automatic production.
6, fixture design for the highest spindle speed 6000R /min, in order to achieve efficient production needs.
7, dual air defense pull design, better extend the life of the set.
